
Owner setup checklist
Work through this checklist before launching the first survey on an account. The dashboard shows owners an Owner setup card that tracks the same items, and an Account onboarding panel walks through them step by step.
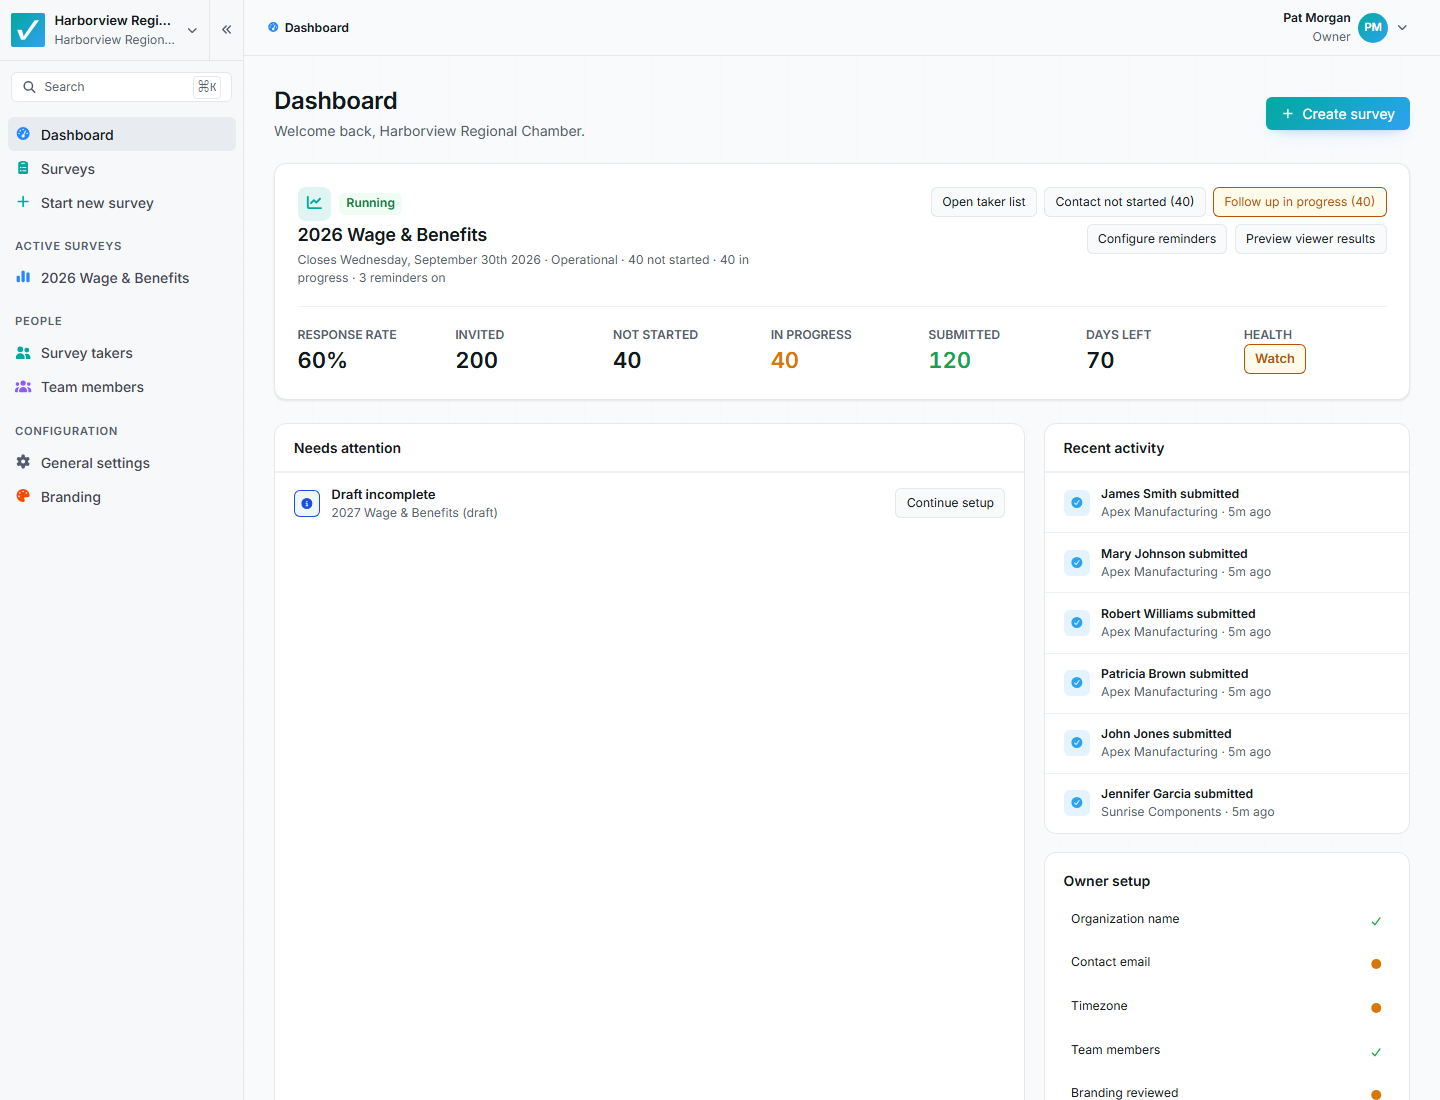
Dashboard showing active surveys, needs attention, owner setup, and drafts.
1. Confirm the organization name
Section titled “1. Confirm the organization name”Go to General settings and check Organization name. This name appears throughout the workspace, in survey pages, and in emails to takers. Use the name your member businesses will recognize.
2. Add the contact email
Section titled “2. Add the contact email”Also under General settings, set Contact email. It is the account’s contact point for operational communication. Use an inbox someone actually checks.
3. Set the account timezone
Section titled “3. Set the account timezone”Choose your Timezone (default is Eastern Time). It controls how survey open and close dates display and when daily digest emails are dispatched. Confirm it before launching so deadlines mean what everyone thinks they mean.
4. Review notification settings
Section titled “4. Review notification settings”The Notifications section of General settings lists eight events that can email owners and managers: survey launched, taker submitted, closing soon, closed, results ready, late responses, new member, and a weekly digest. Each toggle gates real email dispatch, and changes save automatically. Decide which your team wants. See General settings and notifications.
5. Add team members
Section titled “5. Add team members”On the Team members page, invite the people who will help run the account:
- Owner for account-level decision makers.
- Manager for the people operating surveys.
- Viewer for read-only access to published results.
Use the least powerful role that lets each person do their job. See Team members.
6. Review branding
Section titled “6. Review branding”Branding (in beta) can customize the logo, colors, and email presentation your takers see. If you enable it, upload a clean logo, keep colors readable, and check the live survey and email previews. If you skip it, takers see standard Sensible Surveys styling, and that is fine. See Branding your account.
7. Agree on release responsibility
Section titled “7. Agree on release responsibility”Decide now who reviews and releases results after each survey closes. Results are never distributed automatically; a survey can sit closed with nobody able to see results until someone releases them. The dashboard flags these surveys as Closed but not released.
What good setup looks like
Section titled “What good setup looks like”Organization name and contact email are accurate, the timezone matches your region, notifications are deliberate choices rather than defaults, each team member has the smallest sufficient role, branding is either configured and previewed or intentionally left standard, and everyone knows who owns the release step.